Introduction
Managing requirements in spreadsheets like Google Sheets, Excel, or SmartSheets is a common practice in many businesses. However, when transitioning to Azure DevOps Boards, manually transferring these requirements can be time-consuming and error-prone. This guide explains how to efficiently import requirements from spreadsheets into Azure DevOps Boards while mapping them to specific work item types such as Epics, Features, and User Stories.
Why Importing Requirements is Important
- Saves Time
Importing large volumes of requirements (hundreds or thousands of entries) eliminates the need for manual data entry, significantly reducing time spent on the process.
- Reduces Errors
Copying and pasting manually from Excel to DevOps increases the risk of mistakes. An automated import process ensures data integrity and accuracy.
The Import Process
Before starting, ensure that you have an organized structure for your work items in Azure DevOps.
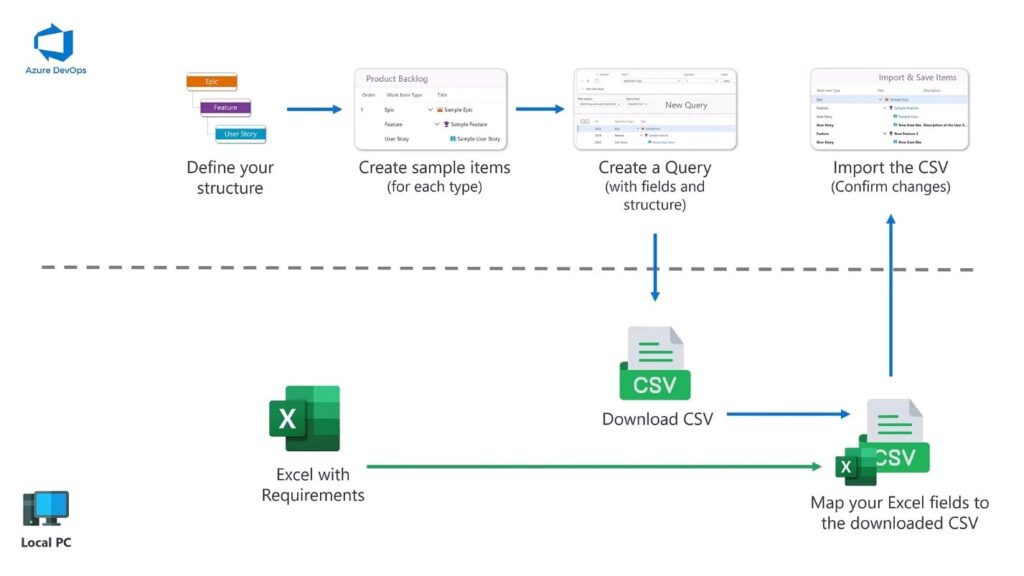
Step 1: Define Your Work Item Structure
Determine the work item types you will use in Azure DevOps, such as:
- Epics
- Features
- User Stories
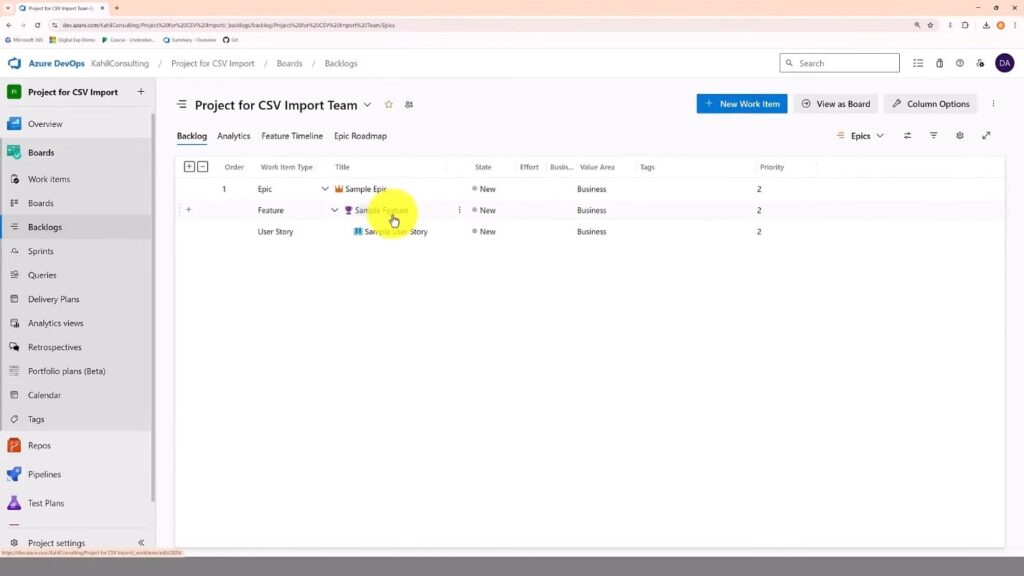
Create at least one sample item for each type in Azure DevOps to establish the structure.
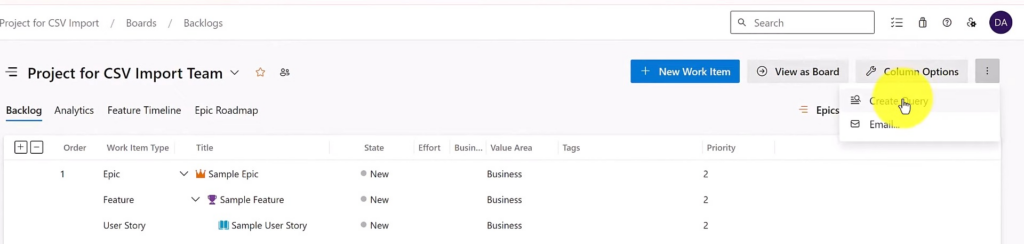
Step 2: Create a Query in Azure DevOps
- Navigate to your backlog.
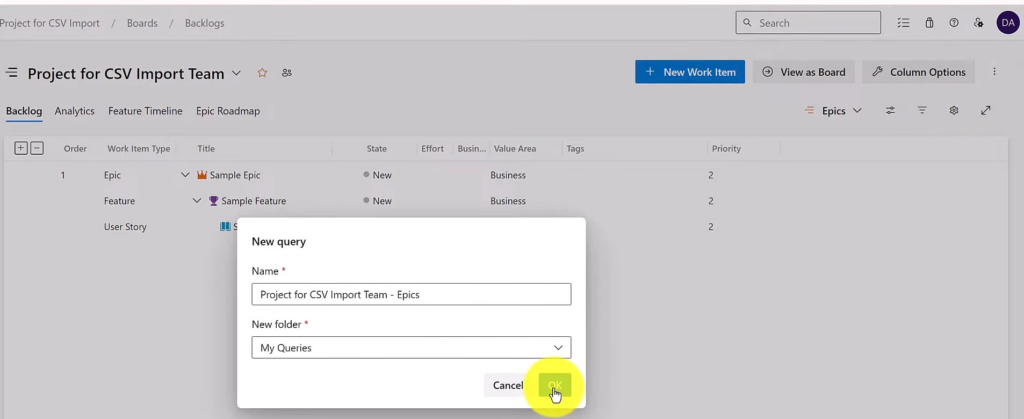
- Click on the three-dot menu and create a query.
- Name the query appropriately.
- Customize the columns by adding or removing fields as necessary.
- Save the query.
Step 3: Export the Query to CSV
Once your query is ready:
- Export it to CSV format.
- Open the CSV file to verify the column structure.
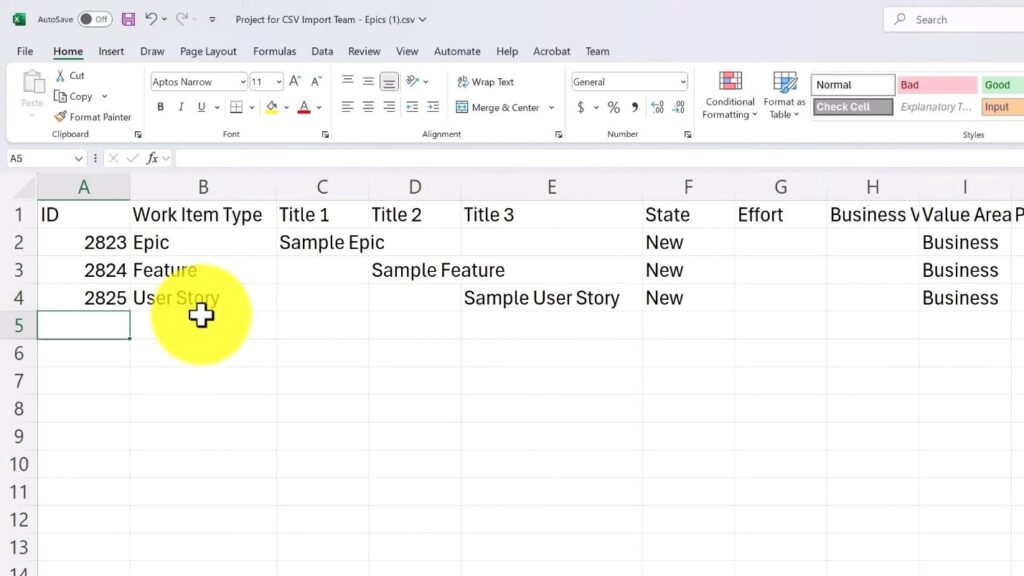
 The exported CSV will include fields such as:
- Work Item Type (Epic, Feature, User Story)
- Title
- State
- Effort
- Business Value
- Priority
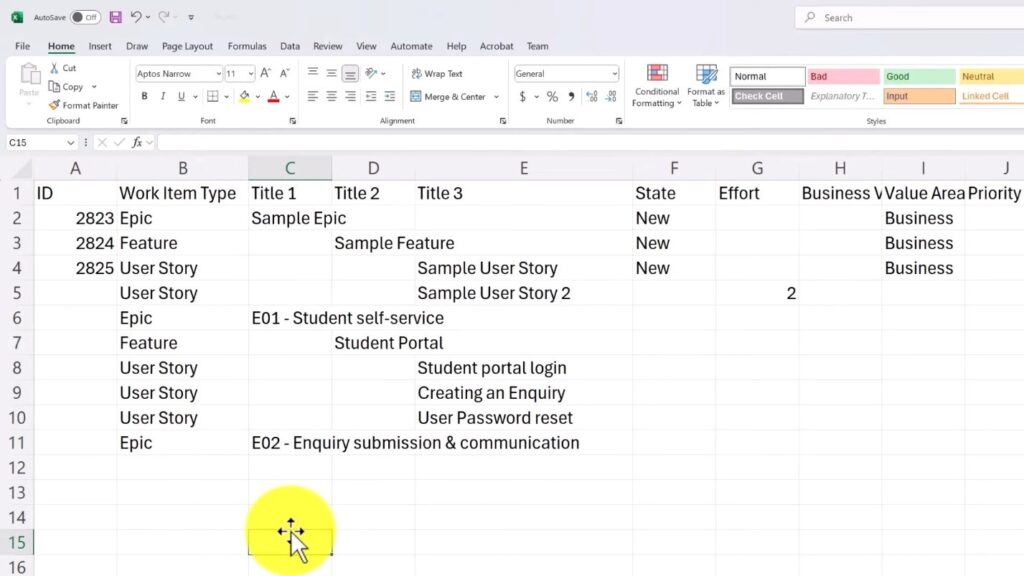
Step 4: Map Excel Data to CSV Format
This step involves copying and pasting your spreadsheet data into the exported CSV while maintaining the correct format and hierarchy:
- Copy and paste Epic names into the Epic column.
- Assign related Features and User Stories beneath the respective Epics.
- Ensure that Feature items are linked to the correct Epics and User Stories to Features.
- Fill in additional fields like effort, priority, and business value as needed.
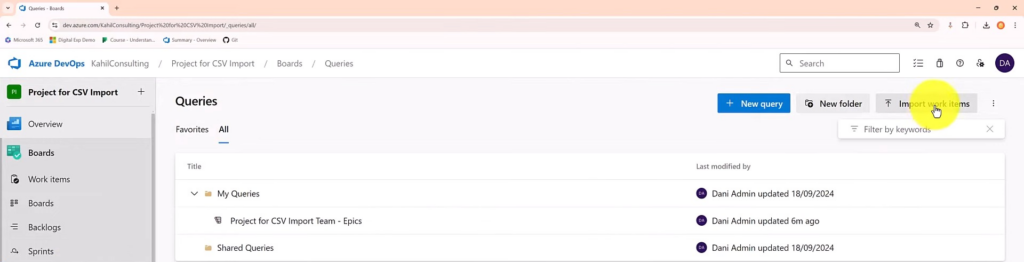
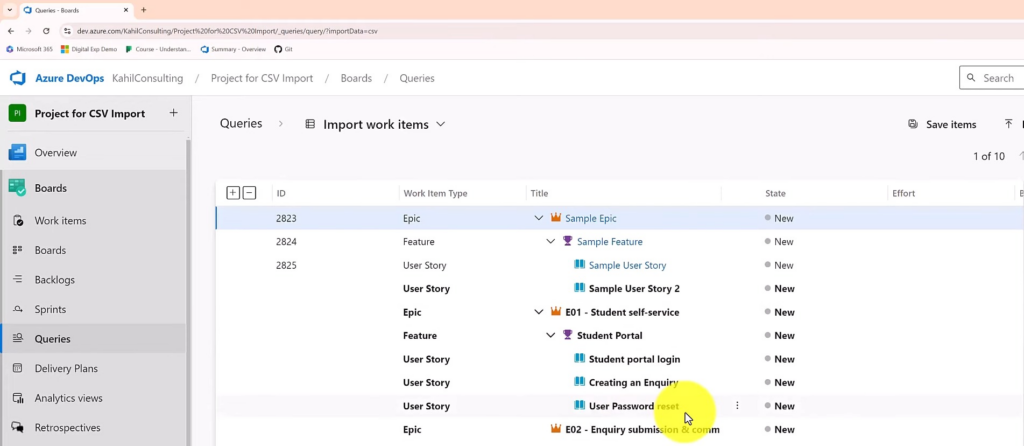
Step 5: Import CSV into Azure DevOps
- Go to Queries in Azure DevOps.
- Select Import Work Items (ensure you are in the correct location to see this option).
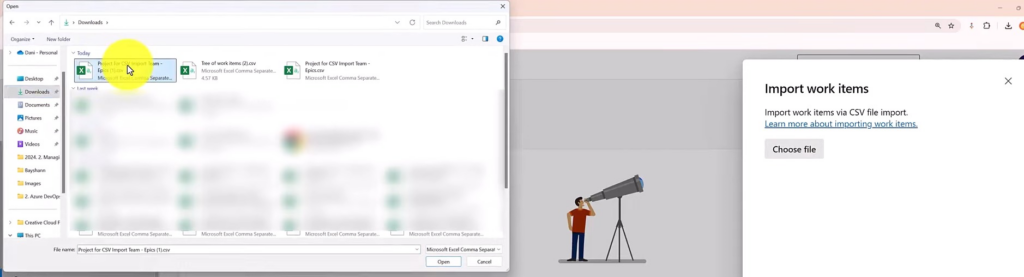
- Upload the modified CSV file.
- Review the new items highlighted in bold before importing.
- Click Save Items to finalize the import.
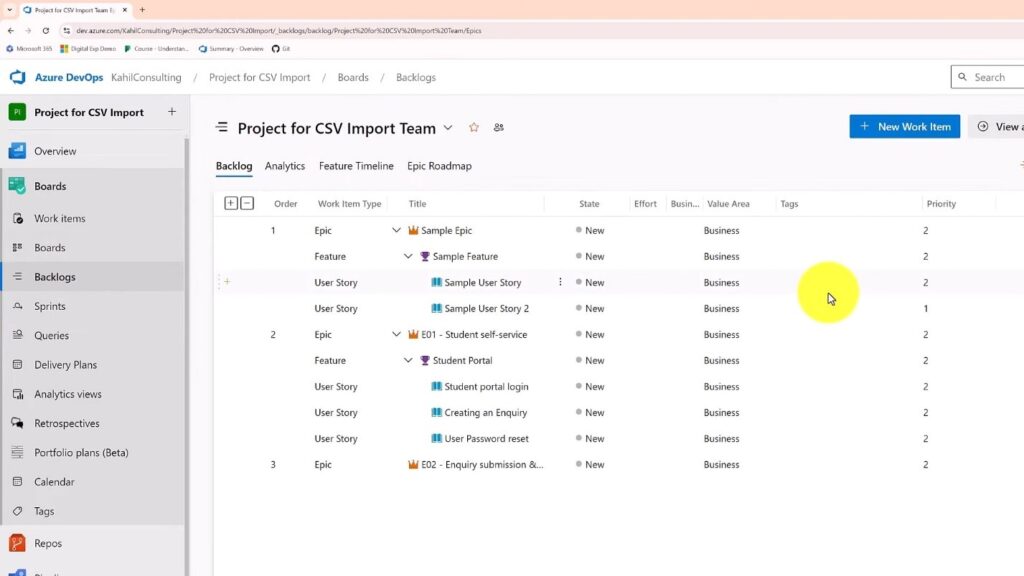
Step 6: Verify Imported Items
Check your backlog to confirm that all imported requirements are correctly structured and mapped.
Additional Tips and Limitations
- State Cannot Be Imported
Newly created items will always have the default “New” state. You must manually update states post-import.
- Rich Text Formatting
If descriptions contain rich text, convert them to HTML before importing to preserve formatting.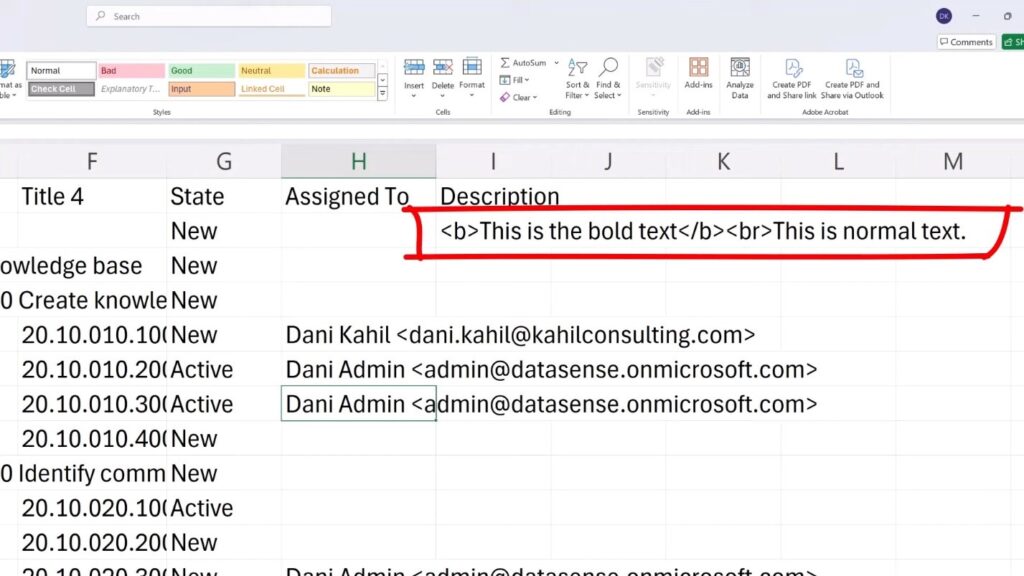
- Custom Work Item Types
If using custom work item types, ensure they follow the same hierarchical structure as Epics, Features, and User Stories.
- Assigning Work Items to Users
Use the format: Username <email> to assign work items. The easiest way to verify formatting is by exporting a sample item with an assigned user.
Conclusion
Following this structured import process significantly streamlines transferring requirements from spreadsheets to Azure DevOps Boards. By leveraging CSV export/import and maintaining a proper work item hierarchy, you can save time, reduce errors, and improve efficiency in managing requirements.
For further Azure DevOps and Microsoft Business Applications insights, stay tuned for more guides and updates.