Introduction
Microk8s is a lightweight, easy-to-install Kubernetes distribution that provides a fully functional cluster in a single virtual machine. It has gained popularity in recent years due to its simplicity and ease of use, especially when compared to other similar Kubernetes options such as k3s and minikube. In this article, we’ll take a closer look at what Microk8s is, how it differs from managed Kubernetes clusters, and what advantages it has over other Kubernetes distributions. We will also share our own experiences using Microk8s in various projects, highlighting the advantages and benefits it provides. Finally, we’ll show you how to set it up on your virtual machine.
What is MicroK8s?
Microk8s is a Kubernetes distribution developed by Canonical, the company that created Ubuntu. It is designed to create a simple single-node Kubernetes cluster that can run on any machine. It is ideal for developers, small deployments, edge computing, IoT, and other situations where a full-scale Kubernetes cluster is not needed or practical. Microk8s has a rich set of features, including automatic updates, built-in service discovery, and support for various storage and networking plugins.
Microk8s vs. Managed Kubernetes Clusters
Managed Kubernetes clusters are typically offered by cloud providers and have the advantage of being fully managed by the provider. This means they handle all administrative tasks such as updating, scaling, monitoring and backup. While managed clusters are convenient, they often come with a higher price tag and may not be suitable for smaller projects or for those who don’t need all the features provided by a full-blown Kubernetes cluster.
In contrast, Microk8s is designed to be lightweight , self-contained and easy to install . It can be run on a single virtual machine, making it ideal for small projects or when you need to quickly get a Kubernetes cluster up and running. It requires minimal configuration and is ideal for developers who want to focus on their applications rather than managing the cluster.
Microk8s vs K3s and Minikube
K3s and Minikube are two other popular lightweight Kubernetes distributions. While they both offer a simplified Kubernetes experience, they have a few key differences compared to Microk8s:
- K3s : Developed by Rancher Labs, K3s is designed for edge computing, IoT, and other resource-constrained environments. It has a smaller binary code size than Microk8s and offers a more minimalistic feature set. However, Microk8s provides better support for various storage and networking plugins and has a more complete feature set out of the box.
- Minikube : Minikube is specifically designed for local development, allowing developers to run a single-node Kubernetes cluster on their local machines. While Minikube is great for development and testing, it lacks some of the more advanced features and plugin support provided by Microk8s, making Microk8s a more general-purpose option.
This table provides an overview of the key differences between Microk8s, Managed Kubernetes Clusters, K3s, and Minikube in terms of their target use cases, installation, management, cost, and capabilities. This will help you easily compare and understand their unique offerings and suitability for different scenarios.
| FEATURE / ASPECT | MICROK8S | MANAGED KUBERNETES CLUSTERS | K3S | MINICUBE |
|---|---|---|---|---|
|
Target use case |
Developers, Small Deployments, Edge Computing, IoT |
Large deployments, enterprises |
Edge computing, IoT, resource-constrained environments |
Local development, testing |
|
Installation |
Simple, single node installation |
Vendor managed multi-node installation |
Simple, single node installation |
Simple, single node installation |
|
Control |
Self-management, minimum administrative tasks |
Provider management, full administrative support |
Self-management, minimum administrative tasks |
Self-management, minimum administrative tasks |
|
Price |
Free, open source |
Paid, prices depend on the provider |
Free, open source |
Free, open source |
|
Automatic updates |
Yes |
Yes |
Yes |
No |
|
Service Discovery |
Built-in |
Depends on provider |
Built-in |
Built-in |
|
Plugins for storage and networking |
Full support |
Depends on provider |
Limited support |
Limited support |
|
Binary size |
Small |
N/A |
The smallest |
Small |
|
Additional features |
Rich set of features out of the box |
Depends on provider |
Minimalistic feature set |
Focused on feature development and testing |
Our experience with Microk8s
We have used Microk8s for several of our projects and it has truly met our expectations for a Kubernetes cluster. The installation went smoothly and we quickly had a fully functional Kubernetes cluster running on a single virtual machine. With Microk8s we have been able to focus on our applications rather than administrative tasks as it delivers a truly uptime experience.
In our experience, Microk8s has proven to be an excellent solution for small deployments, edge computing, and developer environments. It allowed us to easily deploy and manage our applications without the overhead and complexity of a full-blown Kubernetes cluster.”
What will you need?
- Operating system Ubuntu 22.04 LTS.
- Virtual server with at least 2 CPUs, 4 GB of memory and 20 GB of disk space.
- Internet connection.
- Firefox browser.
- Installing MicroK8s .
MicroK8s will install a minimal, lightweight Kubernetes that can run and be used on virtually any machine. It can be installed in no time:
sudo snap install microk8s --classic --channel=1.29
- Join the group
MicroK8s creates a group to ensure smooth use of commands that require administrator privileges. To add the current user to a group and access the .kube cache directory, run the following three commands:
sudo usermod -a -G microk8s $USER
sudo mkdir -p ~/.kube
sudo chown -f -R $USER ~/.kube
You will also need to re-enter the session for the group update to occur:
su - $USER
- Checking status
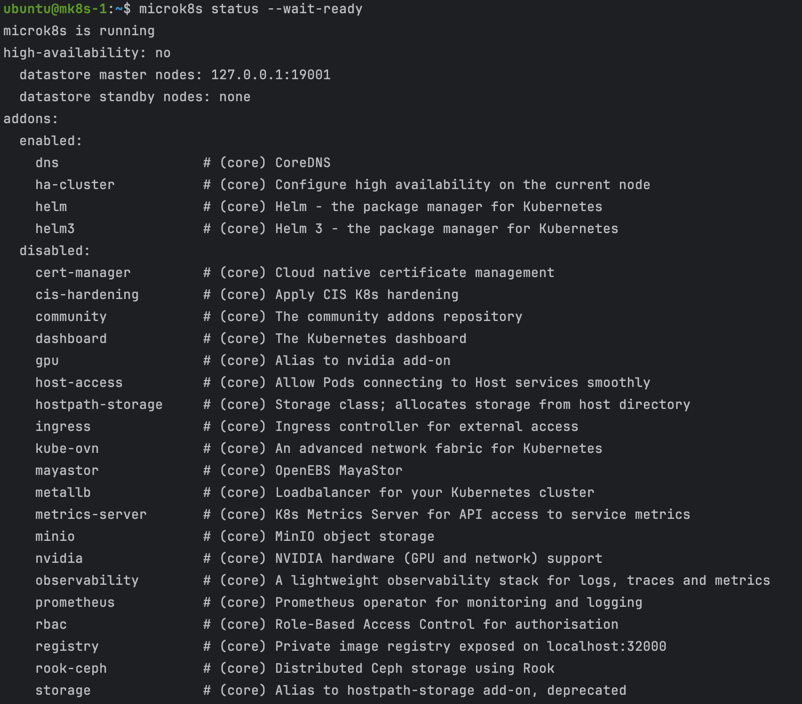
MicroK8s has a built-in command to display its status. During installation --wait-ready, you can use the flag to wait for Kubernetes services to initialize:
microk8s status --wait-ready
- Access to Kubernetes
MicroK8s ships its own version kubectl for accessing Kubernetes. It can be used to run commands to monitor and manage Kubernetes. For example, to view a node:
microk8s kubectl get nodes…or to view running services:
microk8s kubectl get servicesMicroK8s uses a kubectl named command to avoid conflicts with existing kubectl installations. If you don’t have an existing installation, it’s easier to add an alias (add to ~/.bash_aliases), like this:
alias kubectl='microk8s kubectl'
Let’s add command line completion and an alias k for kubectl:
echo 'alias k=kubectl' >>~/.bashrc
echo 'source <(kubectl completion bash)' >>~/.bashrc
echo 'complete -F __start_kubectl k' >>~/.bashrc
source ~/.bashrc
- Application Deployment
Of course, Kubernetes is designed for deploying applications and services. To do this, as with any other Kubernetes, you can use the command kubectl. Try installing the demo application:
kubectl create deployment nginx --image=nginxThe installation may take a minute or two, but you can check the status:
kubectl get pods
- Using add-ons
MicroK8s uses a minimum of components to create clean, lightweight Kubernetes. However, a lot of additional functionality can be achieved with a few keystrokes by using “add-ons” – ready-made components that will provide additional capabilities to your Kubernetes, from simple DNS management to machine learning with Kubeflow !
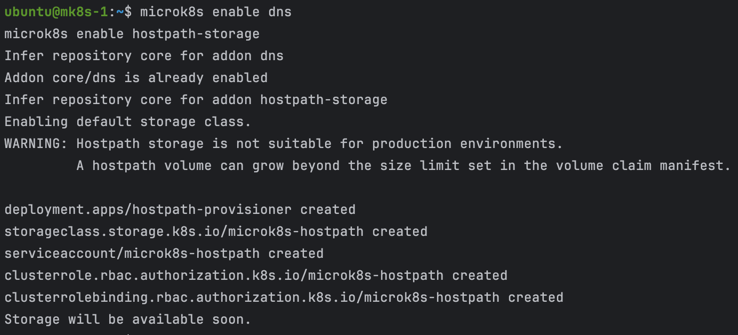
To begin with, it is recommended to add control DNSto facilitate interaction between services. For applications that require storage, the add-on hostpath-storage provides directory space on the host. They are easy to configure:
microk8s enable dns
microk8s enable hostpath-storage
- Starting and stopping MicroK8s
MicroK8s will run until you decide to stop it. You can stop and start MicroK8s using the following simple commands:
microk8s stopwill stop MicroK8s and its services. You can start them again at any time by running the command:
microk8s startPlease note that if you leave MicroK8s running, it will automatically restart after a reboot. If you don’t want this to happen, just remember to run the command microk8s stop before turning off the power.