Launching the first kubernetes master
First of all, we need to generate a config for kubeadmin
./create-config.sh kubeadm
Initiate the first master
kubeadm init --config=kubeadmin/kubeadm-init.yaml
If kubeadm works without errors, then at the output we get approximately the following result:
You can now join any number of control-plane nodes by copying certificate authorities
and service account keys on each node and then running the following as root:

  kubeadm join 10.73.71.25:6443 --token ivwoap.259retezqf34amx8 \
    --discovery-token-ca-cert-hash sha256:b5c93e32457c8e6478782ff62e8ef77acf72738dda59cd603cdf4821abe12ca3 \
    --control-plane

Then you can join any number of worker nodes by running the following on each as root:

kubeadm join 10.73.71.25:6443 --token ivwoap.259retezqf34amx8 \
    --discovery-token-ca-cert-hash sha256:b5c93e32457c8e6478782ff62e8ef77acf72738dda59cd603cdf4821abe12ca3
CNI Calico Installation
The time has come to establish a network in which our pods will work. I use calico, and we will now lauch it.
But from the beginning lets configure access for kubelet. We execute all commands on master01
If you are working from root
export KUBECONFIG=/etc/kubernetes/admin.conf
If as simple user
mkdir -p $HOME/.kube
sudo cp -i /etc/kubernetes/admin.conf $HOME/.kube/config
sudo chown $(id -u):$(id -g) $HOME/.kube/config
You can also manage the cluster from your laptop or any local machine. To do this, copy the /etc/kubernetes/admin.conf file to your laptop or any other machine in $ HOME / .kube / config
Now put CNI according to the Kubernetes documentation
kubectl apply -f https://docs.projectcalico.org/v3.8/manifests/calico.yaml
Wait until all the pods will run
watch -n1 kubectl get pods -A
NAMESPACE     NAME                                       READY   STATUS    RESTARTS   AGE
kube-system   calico-kube-controllers-59f54d6bbc-psr2z   1/1     Running   0          96s
kube-system   calico-node-hm49z                          1/1     Running   0          96s
kube-system   coredns-5c98db65d4-svcx9                   1/1     Running   0          77m
kube-system   coredns-5c98db65d4-zdlb8                   1/1     Running   0          77m
kube-system   kube-apiserver-master01                    1/1     Running   0          76m
kube-system   kube-controller-manager-master01           1/1     Running   0          77m
kube-system   kube-proxy-nkdqn                           1/1     Running   0          77m
kube-system   kube-scheduler-master01                    1/1     Running   0          77m
Launching the second and third kubernetes masters
Before starting master02 and master03, you need to copy the certificates from master01 that kubeadm generated when creating the cluster. We will copy via scp
On master01
export master02=10.73.71.26
export master03=10.73.71.27
scp -r /etc/kubernetes/pki $master02:/etc/kubernetes/
scp -r /etc/kubernetes/pki $master03:/etc/kubernetes/
On master02 and master03
Create a config for kubeadm
./create-config.sh kubeadm
And add master02 and master03 to the cluster
kubeadm init --config=kubeadmin/kubeadm-init.yaml
Adding of worker nodes to the cluster
At the moment, we have a cluster in which three master nodes are already running. But master nodes are machines on which run api, scheduler, and other services of the kubernetes cluster. So to can run our pods, we need the so-called worker nodes.
If you are limited in resources, then you can run pods on master nodes, but we do not recommend doing this.
Install the kubelet, kubeadm, kubectl and docker nodes on the worker same as on the master nodes
Now it’s time to return to the line that kubeadm generated while installing the master node.
It looks like this.
kubeadm join 10.73.71.25:6443 --token ivwoap.259retezqf34amx8 \
    --discovery-token-ca-cert-hash sha256:b5c93e32457c8e6478782ff62e8ef77acf72738dda59cd603cdf4821abe12ca3
It is necessary to execute this command on each worker node.
If you have not written a token, then you can generate a new
kubeadm token create --print-join-command --ttl=0
After work of kubeadm, your new node is entered into the cluster and ready for work
This node has joined the cluster:
* Certificate signing request was sent to apiserver and a response was received.
* The Kubelet was informed of the new secure connection details.

Run 'kubectl get nodes' on the control-plane to see this node join the cluster.
Now let’s look at the result
root@master01:~# kubectl get nodes
NAME         STATUS   ROLES    AGE     VERSION
master01     Ready    master   10d     v1.15.1
master02     Ready    master   10d     v1.15.1
master03     Ready    master   10d     v1.15.1
worknode01   Ready    <none>   5m44s   v1.15.1
worknode02   Ready    <none>   59s     v1.15.1
worknode03   Ready    <none>   51s     v1.15.1
Installation of haproxy on worknodes
Now we have a working cluster with three master nodes and three worker nodes.
The problem is that now our worker nodes do not have HA mode.
If we look at the kubelet config file, we will see that our worker nodes access only one of the three master nodes.
root@worknode01:~# cat /etc/kubernetes/kubelet.conf | grep server:
    server: https://10.73.71.27:6443
In ourcase, this is master03. With this configuration, if master03 crashes, the worker node will lose communication with the cluster API server. To make our cluster fully HA, we will install a Load Balancer (Haproxy) on each of the workers, which according to round robin will divide the requests between three master nodes, and in the kubelet config on worker nodes we will change the server address to 127.0.0.1:6443
curl https://haproxy.debian.net/bernat.debian.org.gpg | \
      apt-key add -
echo deb http://haproxy.debian.net stretch-backports-2.0 main | \
      tee /etc/apt/sources.list.d/haproxy.list
apt-get update
apt-get install haproxy=2.0.\*
First of all, install HAProxy on each worker node.
After HAproxy is installed, we need to create a config for it.
If on the worker nodes there is no directory with config files, then we clone it
git clone https://github.com/rjeka/kubernetes-ceph-percona.git
cd kubernetes-ceph-percona/
And run the config script with the haproxy flag
./create-config.sh haproxy
The script will configure and restart haproxy.
Check if haproxy started listening to port 6443.
root@worknode01:~/kubernetes-ceph-percona# netstat -alpn | grep 6443
tcp        0      0 127.0.0.1:6443          0.0.0.0:*               LISTEN      30675/haproxy
tcp        0      0 10.73.75.241:6443       0.0.0.0:*               LISTEN      30675/haproxy
Now we need to tell kubelet to access localhost instead of the master node. To do this, edit the server value in the /etc/kubernetes/kubelet.conf and /etc/kubernetes/bootstrap-kubelet.conf files on all worker nodes.
vim  /etc/kubernetes/kubelet.conf
vim nano /etc/kubernetes/bootstrap-kubelet.conf
The server value should look like this:
server: https://127.0.0.1:6443
After making the changes, restart the kubelet and docker services
systemctl restart kubelet && systemctl restart docker
Check if all nodes are working properly.
kubectl get nodes
NAME         STATUS   ROLES    AGE     VERSION
master01     Ready    master   29m     v1.15.1
master02     Ready    master   27m     v1.15.1
master03     Ready    master   26m     v1.15.1
worknode01   Ready    <none>   25m     v1.15.1
worknode02   Ready    <none>   3m15s   v1.15.1
worknode03   Ready    <none>   3m16s   v1.15.1
So far, we have no applications in the cluster to test HA. But we can stop the operation of kubelet on the first master node and make sure that our cluster works well.
systemctl stop kubelet && systemctl stop docker
Check from the second master node
root@master02:~# kubectl get nodes
NAME         STATUS     ROLES    AGE   VERSION
master01     NotReady   master   15h   v1.15.1
master02     Ready      master   15h   v1.15.1
master03     Ready      master   15h   v1.15.1
worknode01   Ready      <none>   15h   v1.15.1
worknode02   Ready      <none>   15h   v1.15.1
worknode03   Ready      <none>   15h   v1.15.1
All nodes are working normally, except the one on which we stopped the services.
Don’t forget to turn back the kubernetes services on the first master node
systemctl start kubelet && systemctl start docker
Installing of the Ingress Controller
Ingress controller is Kubernetes add-on, with which we can access our applications from the outside. A detailed description you can find in the Kuberbnetes documentation. There are quite a lot of ingress controllers; we use a controller from Nginx and will talk about its installation. The documentation about the operation, configuration and installation of the Ngressx Ingress controller can be found on the official website.
Let’s start the installation, all commands can be executed from master01.
Install the controller itself
kubectl apply -f https://raw.githubusercontent.com/kubernetes/ingress-nginx/master/deploy/static/mandatory.yaml
And now – a service through which ingress will be available
To do this, prepare the config
./create-config.sh ingress
And send it to our cluster
kubectl apply -f ingress/service-nodeport.yaml
Check if our Ingress works on the right addresses and listens to the right ports.
# kubectl get svc -n ingress-nginx
NAME            TYPE       CLUSTER-IP    EXTERNAL-IP                           PORT(S)                      AGE
ingress-nginx   NodePort   10.99.35.95   10.73.71.25,10.73.71.26,10.73.71.27   80:31669/TCP,443:31604/TCP   10m
 kubectl describe svc -n ingress-nginx ingress-nginx
Name:                     ingress-nginx
Namespace:                ingress-nginx
Labels:                   app.kubernetes.io/name=ingress-nginx
                          app.kubernetes.io/part-of=ingress-nginx
Annotations:              kubectl.kubernetes.io/last-applied-configuration:
                            {"apiVersion":"v1","kind":"Service","metadata":{"annotations":{},"labels":{"app.kubernetes.io/name":"ingress-nginx","app.kubernetes.io/par...
Selector:                 app.kubernetes.io/name=ingress-nginx,app.kubernetes.io/part-of=ingress-nginx
Type:                     NodePort
IP:                       10.99.35.95
External IPs:             10.73.71.25,10.73.71.26,10.73.71.27
Port:                     http  80/TCP
TargetPort:               80/TCP
NodePort:                 http  31669/TCP
Endpoints:                192.168.142.129:80
Port:                     https  443/TCP
TargetPort:               443/TCP
NodePort:                 https  31604/TCP
Endpoints:                192.168.142.129:443
Session Affinity:         None
External Traffic Policy:  Cluster
Events:                   <none>
Web UI (Dashboard) Installation
Kubernetes has a standard Web UI, through which it is sometimes convenient to quickly look at the state of a cluster or its individual parts. In our work, we often use dashboard for the initial diagnosis of deployments or the state of a cluster parts.
Installation. We are using the stable version and haven’t tried 2.0 yet.
#Stable version
kubectl apply -f https://raw.githubusercontent.com/kubernetes/dashboard/v1.10.1/src/deploy/recommended/kubernetes-dashboard.yaml
#Version 2.0
kubectl apply -f https://raw.githubusercontent.com/kubernetes/dashboard/v2.0.0-beta1/aio/deploy/recommended.yaml
After we installed the panel in our cluster, it became available at
http://localhost:8001/api/v1/namespaces/kubernetes-dashboard/services/https:kubernetes-dashboard:/proxy/.
But in order to reach it, we need to use ports from the local machine with the help of kubectl proxy. For us, this scheme is not very convenient. Therefore, we will change the service of the control panel so that the dashboard becomes available on the address of any cluster node on port 30443. There are still other ways to access the dashboard, for example, through ingress. Perhaps we will consider this method in the following publications.
To change the service, run the deploy of the already changed service
kubectl apply -f dashboard/service-nodeport.yaml
Now we need to create the admin user and token to access the cluster through the dashboard
kubectl apply -f dashboard/rbac.yaml
kubectl -n kube-system describe secret $(kubectl -n kube-system get secret | grep admin-user | awk '{print $1}')
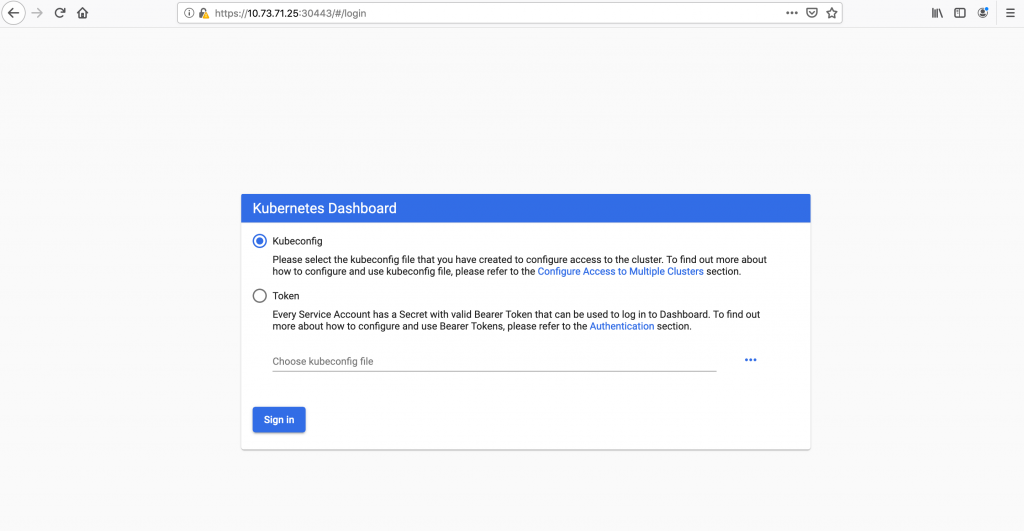
After that, you can log in to the control panel at https://10.73.71.25:30443
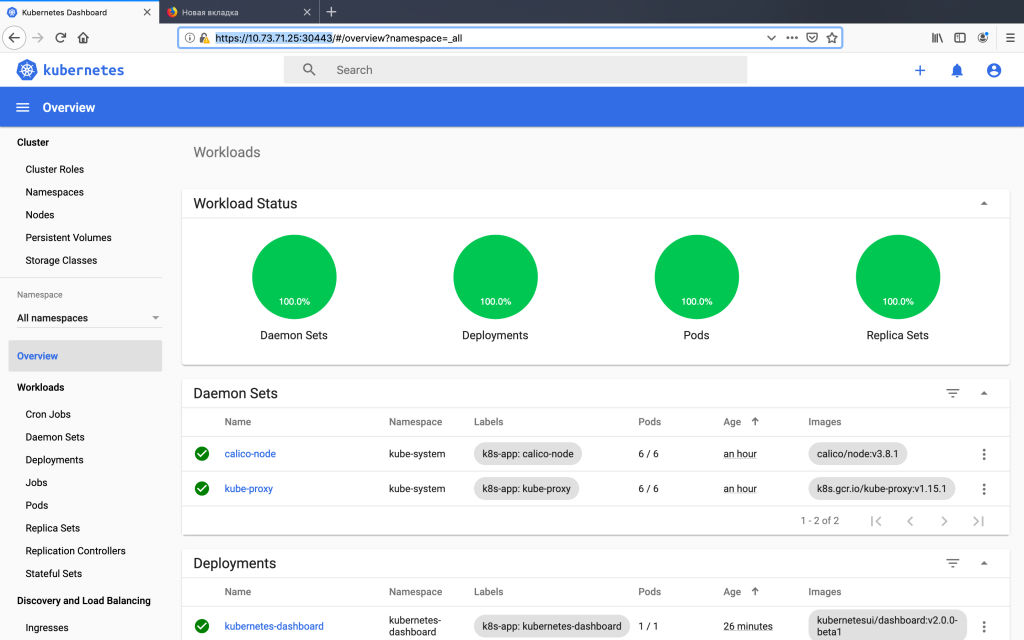
Dashboard home screen
Congratulations! If you have reached this step, then you have a working HA cluster of kubernetes, which is ready for the deployment of your applications.
Kubernetes is the key point of the microservice infrastructure on which various add-ons are required. We plan to talk about some of them in future publications.
We will try to answer all questions in the comments or you can drop us a line per: [email protected]