This article is about setting up and working with Docker Swarm.
Swarm is a standard orchestrator for docker containers, available out of the box if you have docker installed.
What we need to learn:
- Have experience with docker and docker compose.
- Configured docker registry. Swarm doesn’t like working with local images very much.
- Several virtual machines to create a cluster, although in fact the cluster may consist of one virtual machine, but it will be clearer this way.
Terms
In order to use swarm, you need to remember several types of entities:
- Node are our virtual machines that have docker installed. There are
manageralsoworkersnodes. The manager node manages the workers nodes. She is responsible for creating / updating / deleting services on workers, as well as for scaling and maintaining them in the required state. Workers nodes are used only to perform assigned tasks and cannot manage the cluster. - Stack is a set of services that are logically related to each other. In fact, this is a set of services that we describe in a regular compose file. Parts of the stack (services) can be located both on the same node and on different ones.
- Service is exactly what the stack consists of. Service is a description of what containers will be created. If you have used docker-compose.yaml, you are already familiar with this entity. In addition to the standard fields, docker supports a number of additional fields in swarm mode, most of which are located inside the deploy section .
- Task is a directly created container that docker created based on the information we provided when describing the service. Swarm will monitor the state of the container and, if necessary, restart it or move it to another node.

Create a cluster
In order for the cluster to work correctly, you need to open the following ports on virtual machines. For managernode:
firewall-cmd --add-port=2376/tcp --permanent;
firewall-cmd --add-port=2377/tcp --permanent;
firewall-cmd --add-port=7946/tcp --permanent;
firewall-cmd --add-port=7946/udp --permanent;
firewall-cmd --add-port=4789/udp --permanent;
firewall-cmd --reload;

systemctl restart docker;
For workernode
firewall-cmd --add-port=2376/tcp --permanent;
firewall-cmd --add-port=7946/tcp --permanent;
firewall-cmd --add-port=7946/udp --permanent;
firewall-cmd --add-port=4789/udp --permanent;
firewall-cmd --reload;

systemctl restart docker;
Then we go to the virtual machine, which we will have managernode. And run the following command:
docker initIf everything is successful, then in response you will receive the following command:
docker swarm join --token SWMTKN-1-54k2k418tw2j0juwm3inq6crp4ow6xogswihcc5azg7oq5qo7e-a3rfeyfwo7d93heq0y5vhyzod 172.31.245.104:2377
It will need to be run on all workernodes in order to join them to the newly created cluster.
If everything went well, by executing the following command on the managernode in the console, you will see something like this:
docker node ls
ID                            HOSTNAME   STATUS    AVAILABILITY   MANAGER STATUS   ENGINE VERSION
vj7kp5847rh5mbbqn97ghyb72 *   dev-2      Ready     Active         Leader           20.10.14
zxo15m9wqdjd9f8pvg4gg6gwi     stage      Ready     Active                          20.10.9
I have a virtual machine with hostname dev-2is manager, but stageis a workernode.
Basically, we are ready to run sevices and stacks on our workernode.
If we want to remove a node from the cluster, we need to go to the virtual machine that is it and run the command:
docker swarm leaveIf you then visit the managernode and execute docker node ls, you will notice that its status has changed from Ready to Down (this may take some time). Swarm will no longer use this node to host containers, and you can safely do maintenance work without fear of harming running containers. In order to permanently delete a node, you need to execute (on the managernode):
docker node rm stageStack and Service
To create our stack, I will take as an example a compose file for a node js web server that is listening on port 4003 :
# docker-compose.stage.yaml

version: "3.9"

services:
  back:
    image: docker-registry.ru:5000/ptm:stage
    ports:
      - "4003:4003"
    environment:
      TZ: "Europe/Moscow"
    extra_hosts:
      - host.docker.internal:host-gateway
    command: make server_start
    volumes:
      - /p/ptm/config/config.yaml:/p/ptm/config/config.yaml
      - /p/ptm/stat/web:/p/ptm/stat/web
First, you need to get the image from the registry and only then deploy it to our cluster:
docker pull docker-registry.ru:5000/ptm:stage;
docker stack deploy --with-registry-auth -c ./docker-compose.stage.yaml stage;
All these commands must be run on managernode. The option --with-registry-authallows you to pass authorization data to the worker node in order to use the same image from the register. stagethis is the name of our stack.
You can view the list of stacks with:
docker stack ls
NAME        SERVICES   ORCHESTRATOR
stage       1          Swarm
List of services inside the stack:
docker stack services stage
ID             NAME         MODE         REPLICAS   IMAGE                               PORTS
qq8spne5gik7   stage_back   replicated   1/1        docker-registry.ru:5000/ptm:stage   *:4003->4003/tcp
Detailed information about the service:
docker service ps --no-trunc stage_back
ID                          NAME               IMAGE                                                                                                       NODE      DESIRED STATE   CURRENT STATE           ERROR     PORTS
qok4z2rbl9v8238phy3lxgnw9   stage_back.1       docker-registry.ru:5000/ptm:stage@sha256:8f5dca792c4e8f1bf94cb915505839a73eb50f38540e7d6d537a305594e51cae   stage     Running         Running 1 minute ago
khctf0lqbk5l9de81ifwuzwer    \_ stage_back.1   docker-registry.ru:5000/ptm:stage@sha256:b4ff5e2fbb0daba7985122098d45a5873f1991fd8734a3a89f5affa5daf96e43   stage     Shutdown        Shutdown 40 hours ago
Here you can see that a container was already launched for this service (40 hours ago).
To see more detailed information about the service in the form of JSON:
 docker service inspect stage_back

 [
    {
        "ID": "qq8spne5gik7lqisqwo6u7ybr",
        "Version": {
            "Index": 24526
        },
        "CreatedAt": "2022-04-06T18:37:15.002080284Z",
        "UpdatedAt": "2022-04-06T18:51:09.9827704Z",
        .......
        "Endpoint": {
            "Spec": {
                "Mode": "vip",
                "Ports": [
                    {
                        "Protocol": "tcp",
                        "TargetPort": 4003,
                        "PublishedPort": 4003,
                        "PublishMode": "ingress"
                    }
                ]
            },
            "Ports": [
                {
                    "Protocol": "tcp",
                    "TargetPort": 4003,
                    "PublishedPort": 4003,
                    "PublishMode": "ingress"
                }
            ],
            "VirtualIPs": [
                {
                    "NetworkID": "obmqmpiujnamih7k76q87c058",
                    "Addr": "10.0.0.61/24"
                },
                {
                    "NetworkID": "fufdtvhekbyhpfvb71zosei0k",
                    "Addr": "10.0.60.2/24"
                }
            ]
        },
        "UpdateStatus": {
            "State": "completed",
            "StartedAt": "2022-04-06T18:46:37.03796414Z",
            "CompletedAt": "2022-04-06T18:51:09.982709527Z",
            "Message": "update completed"
        }
    }
]
Here you can also see which ports the service is listening to, which networks it participates in, what status it has, and much more.
You can remove a stack like this:
docker stack rm stageYou can also run individual services, for example:
docker service create --name nginx --replicas 3 nginx:alpine;
docker service ps nginx;
ID             NAME      IMAGE          NODE      DESIRED STATE   CURRENT STATE            ERROR     PORTS
awn4xed5twz3   nginx.1   nginx:alpine   stage     Running         Running 24 minutes ago
m42te1ahbi3q   nginx.2   nginx:alpine   prod-1    Running         Running 20 minutes ago
otkio3yfcw7o   nginx.3   nginx:alpine   dev-2     Running         Running 16 minutes ago
In this example, we started the nginx service in the form of 3 instances, which swarm scattered over 3 nodes.
You can delete a service like this:
docker service rm nginxlabel
Swarm deploys services to any available node(s) by default, but generally we need to deploy them to a specific node or a specific group. And this is where labels come to the rescue.
For example, we also have an stageenvironment prod. stageis used for internal demonstration of the product, and prodas you can guess from the name, it is a direct production.
For each of the environments, we have a compose file: docker-compose.stage.yamland docker-compose.prod.yaml. By default, swarm will scatter service randomly across nodes. And we would like the stage service to run only on the stage virtual machine and similarly for prod.
First, let’s add another node to the cluster, as worker:
# ssh into another virtual machine and add it to the cluster
docker swarm join --token SWMTKN-1-54k2k418tw2j0juwm3inq6crp4ow6xogswihcc5azg7oq5qo7e-a3rfeyfwo7d93heq0y5vhyzod

# execute the command on the manager node:
docker node ls
ID                            HOSTNAME   STATUS    AVAILABILITY   MANAGER STATUS   ENGINE VERSION
vj7kp5847rh5mbbqn97ghyb72 *   dev-2      Ready     Active         Leader           20.10.14
k3wjrl2o827in7k55wqfjfyxs     prod-1     Ready     Active                          20.10.14
zxo15m9wqdjd9f8pvg4gg6gwi     stage      Ready     Active                          20.10.9
Then we need to mark up our nodes:
docker node update --label-add TAG=stage stage
docker node update --label-add TAG=prod prod-1
Using the virtualok hostname, we hang the label. In order to make sure that everything went well, you need to run the following command:
docker node inspect stageWe are looking for a section Spec.Labelswhere we should see the label that we added:
"Spec": {
    "Labels": {
        "TAG": "stage"
    },
    "Role": "worker",
    "Availability": "active"
},
After that, we need to add the directive to our compose file placement, where a condition is written that indicates on which nodes to deploy this service:
# docker-compose.stage.yaml

version: "3.9"

services:
  back:
    image: docker-registry.ru:5000/ptm:stage
    ports:
      - "4003:4003"
    environment:
      TZ: "Europe/Moscow"
    extra_hosts:
      - host.docker.internal:host-gateway
    command: make server_start
    volumes:
      - /p/ptm/config/config.yaml:/p/ptm/config/config.yaml
      - /p/ptm/stat/web:/p/ptm/stat/web
    # swarm
    deploy:
      placement:
        constraints:
          - "node.labels.TAG==stage"
For docker-compose.prod.yamlwill be similar, but with the prod tag (however, for the outside world, you need to use a different port, for example 4004 ). After deploying the stacks data, you will ensure that services are only deployed to nodes with a specific tag.
Routing
At the moment we have 3 nodes: a managernode, a node for the stage version of the application and another one for production.
docker node ls
ID                            HOSTNAME   STATUS    AVAILABILITY   MANAGER STATUS   ENGINE VERSION
vj7kp5847rh5mbbqn97ghyb72 *   dev-2      Ready     Active         Leader           20.10.14
k3wjrl2o827in7k55wqfjfyxs     prod-1     Ready     Active                          20.10.14
zxo15m9wqdjd9f8pvg4gg6gwi     stage      Ready     Active
And if we try to deploy our stack for docker-compose.prod.yamlthe same port 4003 as for the already running stack docker-compose.stage.yaml, we will get an error related to the fact that the port is already busy.
Hmmm… why did it happen? 🤔 And what’s more, if we go to the virtual machine prod-1and do curl 127.0.0.1:4003, we will see that our service is available, although we haven’t managed to deploy anything on this node yet?
This is due to the fact that swarm has a ingressnetwork that is used to route traffic between nodes. If the service has a public port, then swarm listens to it and, if a request is received for it, does the following: it determines whether there is a container on this host machine, and if not, it finds the node running the container for this service and redirects the request there.

In this example, an external balancer HAProxy is used, which balances requests between three virtual machines, and then swarm redirects requests to the appropriate containers.
That’s why you have to docker-compose.prod.yamluse any other public port than the one we specified in docker-compose.stage.yaml.
You can disable automatic traffic routing using the following mode: hostdeclaration ports:
# docker-compose.prod.yaml
version: "3.9"

services:
  back:
    image: docker-registry.ru:5000/ptm:stage
    ports:
		  - target: 4003
    		published: 4004
		    protocol: tcp
    		mode: host
    environment:
      TZ: "Europe/Moscow"
    extra_hosts:
      - host.docker.internal:host-gateway
    command: make server_start
    volumes:
      - /p/ptm/config/config.yaml:/p/ptm/config/config.yaml
      - /p/ptm/stat/web:/p/ptm/stat/web
    # swarm
    deploy:
      placement:
        constraints:
          - "node.labels.TAG==prod"
In this case, a request that comes to port 4004 will be sent by swarm only to the container of the current node and nowhere else.
In addition, it is necessary to mention such a setting as mode, although this does not directly apply to routing. It can take the following values: globalor replicated(default):
deploy:
	mode: global

deploy:
	mode: replicated
  replicas: 4
If globalthis means that this service will be launched in exactly one instance on all possible nodes. This replicatedmeans that the nth number of containers for this service will be launched on all available nodes.
Zero downtime deployment
One of the very useful features that comes out of the box is the ability to seamlessly change containers during deployment. Yes, this is also possible with docker-compose, but you need to write a bash / ansible binding or keep an additional container replica (even if only one is required for the load) and switch traffic from one container to another at the load balancer level.
With docker swarm, all this is not necessary, you just need to slightly adjust the service config.
First you need to add a directive healthcheck:
healthcheck:
  test: curl -sS http://127.0.0.1:4004/ptm/api/healthcheck || echo 1
  interval: 30s
  timeout: 3s
  retries: 12
It is intended to allow docker to determine if your container is running correctly.
test– the result of executing this command is used by docker to determine if the container is working correctly.interval– how often to check the status. In this case, every 30 seconds.timeout– timeout for waiting for command execution.retries– number of attempts to check the state of our server inside the container.
After adding this directive to the compose file, we will see information about the container’s vital state in the Status column.
docker container ls
CONTAINER ID   IMAGE                               COMMAND                  CREATED        STATUS                PORTS      NAMES
b66aa4c93fda   docker-registry.ru:5000/ptm:stage   "docker-entrypoint.s…"   2 days ago     Up 2 days (healthy)   4003/tcp   prod_back.1.6x33tl8sj9t5ddlbbm2rrxbrn
After you deploy your stack, you will see that the container first has the starting status (the server inside our container is starting), and after a while it will get the healthy status (the server has started), otherwise unhealthy . Docker in swarm mode not only monitors the health state of the container, but also tries to recreate the container if it goes into the unhealthy state.
After we have taught docker to monitor the container’s health, we need to add settings to update the container:
deploy:
  replicas: 1
  update_config:
    parallelism: 1
    order: start-first
    failure_action: rollback
    delay: 10s
replicas this is the number of containers that need to be started for this service.
The directive update_config describes how the service should be updated:
parallelism– number of containers for simultaneous update. By default, this parameter is set to 1 – containers will be updated one at a time. 0 – update all containers at once. In most cases, this number should be less than the total number of replicas in your service.order– The order of updating containers. By defaultstop-first, the current container is first stopped and then a new one is started. For a seamless update, we need to usestart-firstthis to start a new container first and then shut down the old one.failure_action– strategy in case of failure. There are several options:continue,rollback, orpause(default).delay– delay between updating a group of containers.
Also useful is the directive rollback_config, which describes the behavior in case of a failure during an update, as well as the directive restart_policy, which describes when and how to restart containers in case of problems.
deploy:
  replicas: 1
  update_config:
    parallelism: 1
    order: start-first
    failure_action: rollback
    delay: 10s
  rollback_config:
    parallelism: 0
    order: stop-first
  restart_policy:
    condition: any
    delay: 5s
    max_attempts: 3
window: 120scondition– there are several possible optionsnone,on-failureorany.delay -how long to wait between restart attempts.max_attempts– the maximum number of attempts to restart.window– how long to wait before determining that the restart succeeded.
Final docker-compose.yml
version: "3.9"

services:
  back:
    image: docker-registry.ru:5000/ptm:stage
    ports:
      - "4003:4003"
    environment:
      TZ: "Europe/Moscow"
    extra_hosts:
      - host.docker.internal:host-gateway
    command: make server_start
    volumes:
      - /p/ptm/config/config.yaml:/p/ptm/config/config.yaml
      - /p/ptm/stat/web:/p/ptm/stat/web
    # swarm
    deploy:
      placement:
        constraints:
          - "node.labels.TAG==stage"
      replicas: 1
      update_config:
        parallelism: 1
        order: start-first
        failure_action: rollback
        delay: 10s
      rollback_config:
        parallelism: 0
        order: stop-first
      restart_policy:
        condition: any
        delay: 5s
        max_attempts: 3
        window: 120s
    healthcheck:
      test: curl -sS http://127.0.0.1:4003/ptm/api/healthcheck || echo 1
      interval: 30s
      timeout: 3s
      retries: 12
To update our service in the running stack, we need to execute the following command:
# pull image
docker pull docker-registry.ru:5000/ptm:stage;
docker service update --image docker-registry.ru:5000/ptm:stage stage;
Then, if executed docker container lson the workernode, we will see that a new container has started with the starting status , and when it becomes healthy , swarm will switch traffic to the new container and stop the old one.
CONTAINER ID   IMAGE                               COMMAND                  CREATED         STATUS                           PORTS                                       NAMES
2fd259e82ade   docker-registry.ru:5000/ptm:stage   "docker-entrypoint.s…"   3 seconds ago   Up 1 second (health: starting)   4003/tcp                                    stage_back.1.bxa0a1y86mnsi8yyd0wpxhc7j
7e726dbc2f0d   docker-registry.ru:5000/ptm:stage   "docker-entrypoint.s…"   25 hours ago    Up 25 hours (healthy)            4003/tcp                                    stage_back.1.q20unddw9v9i3tdojohckv7cw
Thanks to the and directives rollback_config, restart_policywe have described what swarm will do with the container if it fails to start and in which case to restart the container, as well as the maximum number of attempts and delays between them.
This is how, with the help of a dozen lines, we got a seamless deployment for our containers.
secrets
Swarm provides storage for private data (secrets) that containers need. As a rule, this functionality is used to store logins, passwords, encryption keys and access tokens from external systems, databases, etc.
Let’s create a yaml file with a “super secret” token:
# example.yaml
token: sfsjksajflsf_secret
Let’s create a secret named back_config:
docker secret create back_config example.yaml
nys6v16j4d8ymmif87sq6w305

# show secrets
docker secret ls
ID                          NAME          DRIVER    CREATED         UPDATED
nys6v16j4d8ymmif87sq6w305   back_config             9 seconds ago   9 seconds ago

# inspect specific secret
docker secret inspect back_config
[
    {
        "ID": "nys6v16j4d8ymmif87sq6w305",
        "Version": {
            "Index": 24683
        },
        "CreatedAt": "2022-04-13T15:19:14.474608684Z",
        "UpdatedAt": "2022-04-13T15:19:14.474608684Z",
        "Spec": {
            "Name": "back_config",
            "Labels": {}
        }
    }
]
In order to use it, we need to add 2 sections. First, the section secrets, where we indicate that we take a secret from the outside (from swarm) under the name back_config. Secondly, let’s connect the secret itself in the service (also a directive secrets) along the path /p/ptm/config/config.json.
version: "3.9"

services:
  back:
    image: docker-registry.ru:5000/ptm:stage
    ports:
       - "4004:4003"
    environment:
      TZ: "Europe/Moscow"
    extra_hosts:
      - host.docker.internal:host-gateway
    command: make server_start
    volumes:
      - /p/ptm/stat/web:/p/ptm/stat/web
    secrets:
      - source: back_config
        target: /p/ptm/config/config.yaml
    # swarm
    deploy:
      placement:
        constraints:
          - "node.labels.TAG==prod"
      replicas: 1
      update_config:
        parallelism: 1
        order: start-first
        failure_action: rollback
        delay: 10s
      rollback_config:
        parallelism: 0
        order: stop-first
      restart_policy:
        condition: any
        delay: 5s
        max_attempts: 3
        window: 120s
    healthcheck:
      test: curl -sS http://127.0.0.1:4004/ptm/api/healthcheck || echo 1
      interval: 30s
      timeout: 3s
      retries: 12

secrets:
  back_config:
    external: true
Previously, we mounted config.yaml as volume, but now we get it from swarm and mount it at the specified path. If we now go inside the container, we will find that our secret is in /p/ptm/config/config.yaml.
# enter to container
docker exec -it $container_id sh

cat /p/ptm/config/config.yaml;
Portainer
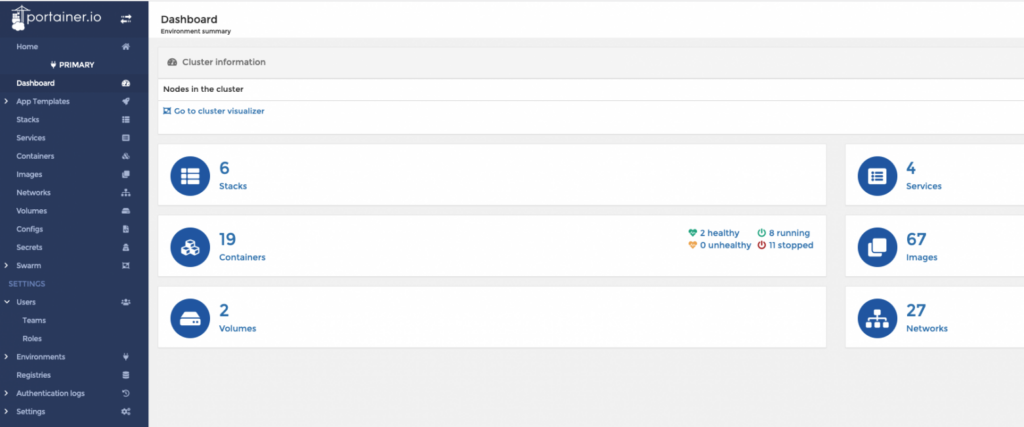
In addition, I want to mention such a tool as portainer. Instead of constantly climbing managernode and executing routine commands in the console, you can use the web panel to manage docker swarm. This is a fairly handy tool that allows you to view data about stacks, services and containers in one place. You can edit existing services, as well as start new ones. In addition, you can view the logs of running containers and even go inside them remotely. In addition, portainer can act as a docker registry, and also provides secret and config management.
In order to install it, you must first download the .yml file with a description of the services:
curl -L https://downloads.portainer.io/portainer-agent-stack.yml \
    -o portainer-agent-stack.yml
Then deploy it to our cluster:
docker stack deploy -c portainer-agent-stack.yml portainerEach nodewill have an agent installed that will collect data, and managera server with a web panel will be installed on each.
We must not forget to open port 9443 on the virtual machine, which is manager:
firewall-cmd --add-port=9443/tcp --permanent;
firewall-cmd --reload;
We go in the browser to the address https://ip:9443.
We agree that we trust the https certificate (portainer, creates a self-signed one by default). Create a user and enjoy.
Outcome
Docker Swarm is a lightweight container orchestrator that is available out of the box. You can deal with it superficially in a couple of days, and deeply in a week. And in my opinion, it covers most of the needs for small and medium teams. Unlike Kuberneteus, it is much easier to learn and does not require the allocation of additional resources in the form of people (an individual or even a department) and hardware. If your development team is less than 100 people and you are not running hundreds of unique types of containers, then its capabilities will most likely be enough for you.