EC2 (elastic compute cloud) is a service that provides computing power by providing virtual / physical machines with pre-created images of operating systems (for example, Ubuntu, Debian, Windows).
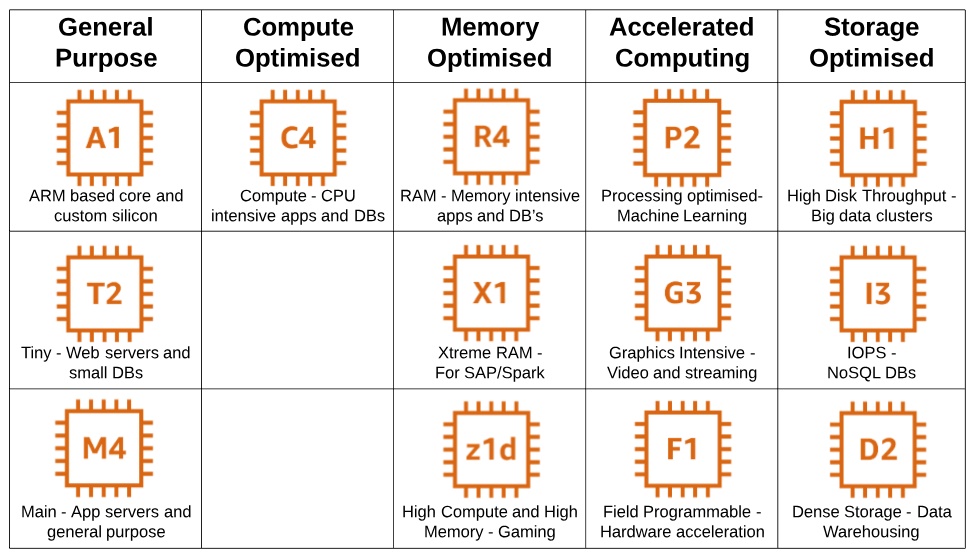
Types of instances available for selection:
Regarding images, AWS EC2 uses AMI (Amazon machine image), which is also the image of a pre-built operating system that will be used by the EC2 instance. The closest analogy is a virtual disk with an already installed system, for example, in Virtual Box.
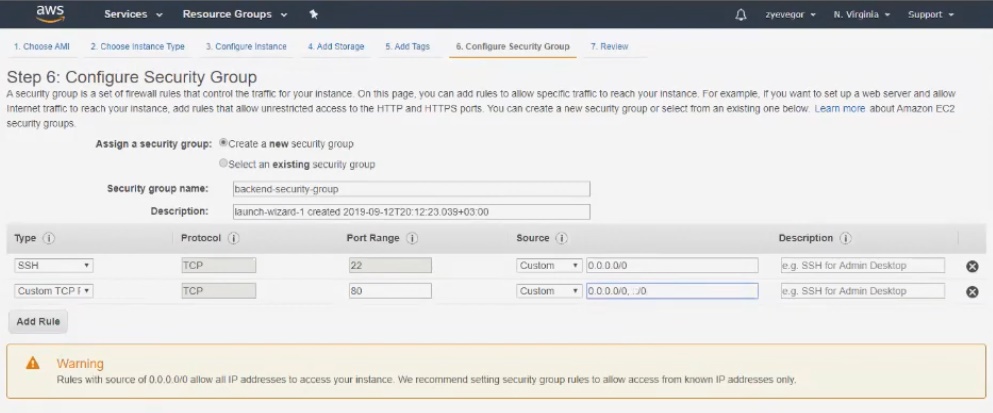
It is important to know that when we configure the machine and select the image, we will need to configure access. Since the machine will be in the cloud, we and other users will need to reach out to it. To do this, configure Security group – a set of rules (policy) that applies to the EC2 instance and includes permissions for incoming and outgoing traffic.
Work with the console
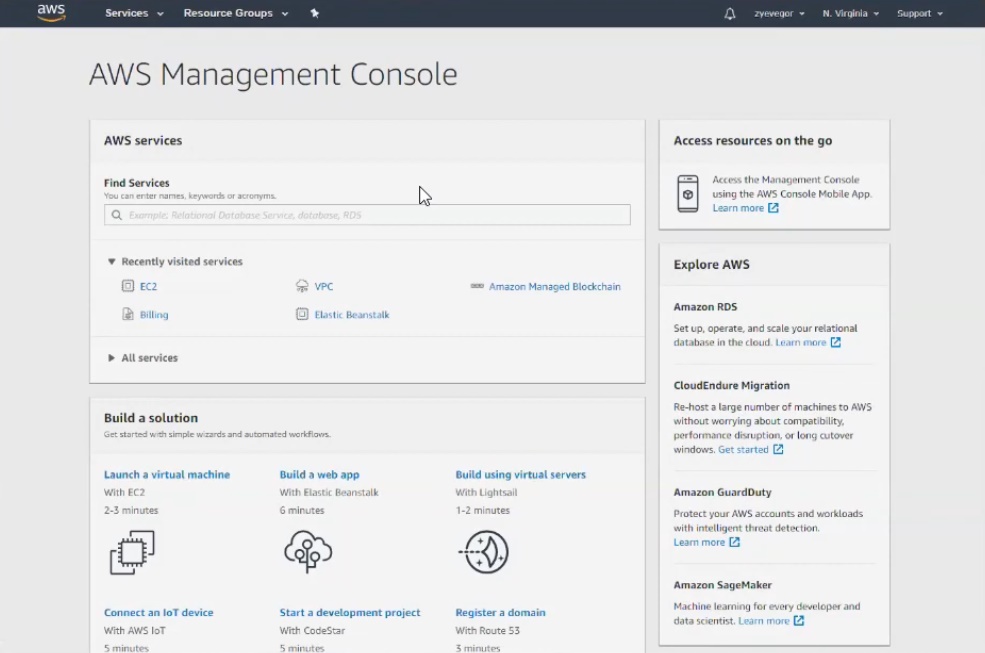
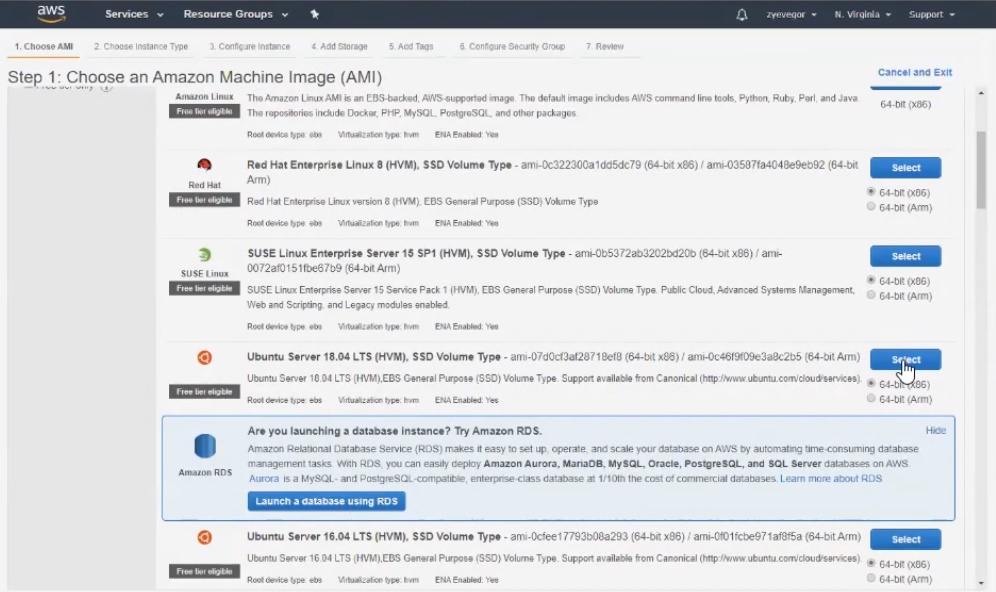
Immediately after registering for the service, you will be taken to the AWS EC2 console. There you can choose EC2 and the type of machine on which we will deploy everything. In our case, select Ubuntu Server.
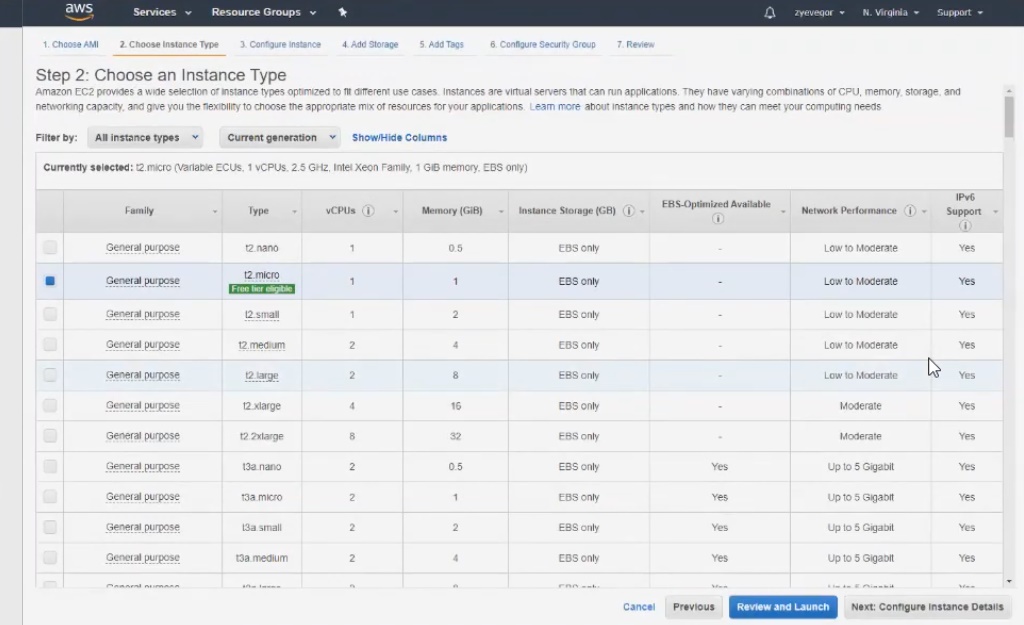
An important point: at step number 2, we are interested in t2micro (marked with a green sticker), because everything else will be paid.
In the next three steps, we leave the default settings, but step 6 should be given special attention. Here you need to enter the name of the group, for example, backend-security-group, and then immediately add a rule that only the 80th port can connect from the outside.
In the seventh step, click Launch and start the instance. But before that, the system will ask you to create a key for connecting via ssh. When all the steps are completed, it takes 1-2 minutes to initialize.
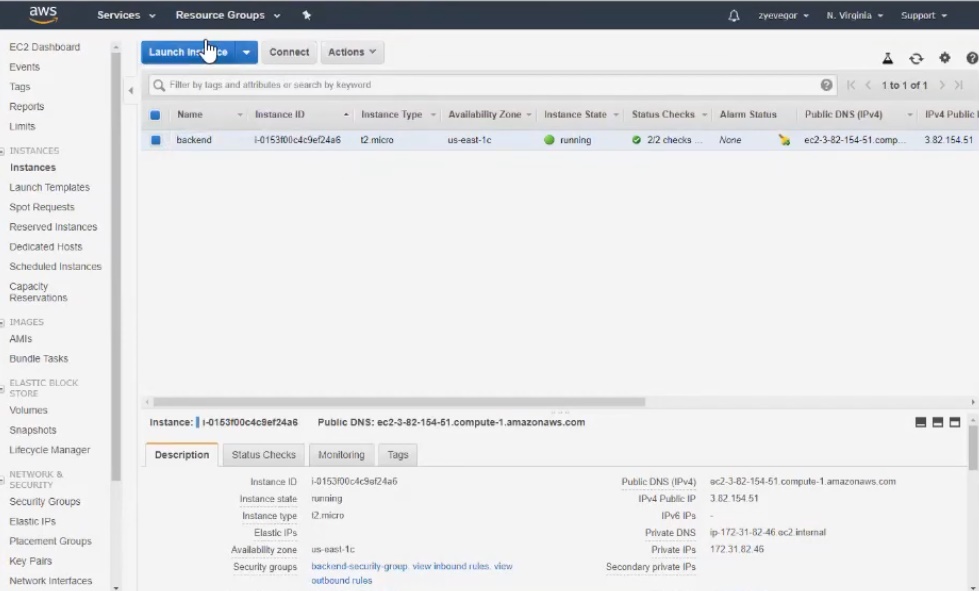
The created instance we will call backend.
Connection
If someone forgot about the intricacies of the connection, the service will promptly tell you about it:
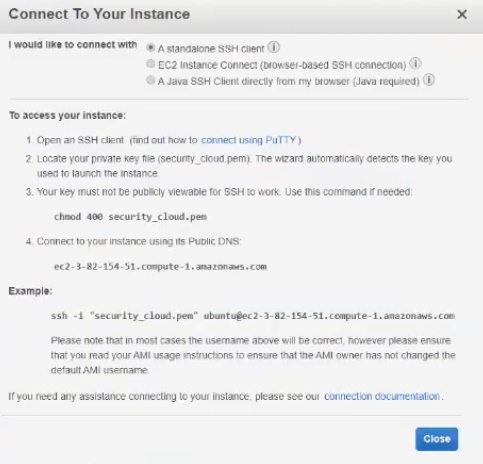
You can use a separate program to connect, for example, Bitvise SSH Client – a very convenient tool.
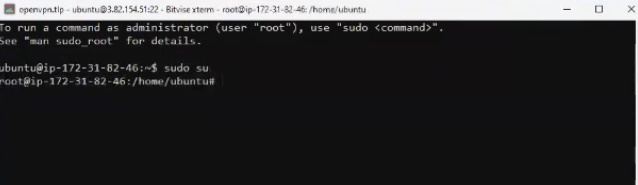
The machine immediately has public and private IP addresses. We use public for access to the machine, which we use, accessing it via ssh. We write ubuntu as username, then we import the key we created. After that you only have to log in to machine. By the way, we will perform all the actions from under the root, for which we type the command sudo su.
Connection to database
As a database, it was decided to use PostgreSQL. To continue, create a new instance with the following settings:
- put 16 GB in the Size column (step number 4);
- Security group name we will call database-security-group (step number 6);
- add the rule in the configuration by selecting PostgreSQL from the sub-list (step number 6).
By the way, here in the IP-address field and you can add security groups, in our case we are talking about backend-security-group. Thus, everyone who belongs to this group will gain access to the database on the private network.
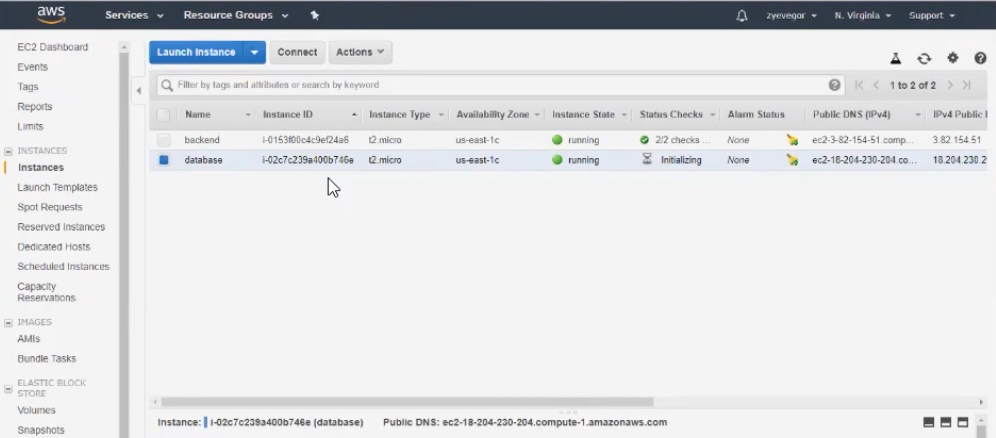
As a result, we get two instances in the console – backend and database.
Create and deploy the application
Create a new project using WebStorm and Node.js. Our task is to write a simple application that will do only two things – respond to pings and count the number of requests to a specific end point and, accordingly, issue it.
We will deploy the application in two stages. To deploy, go to a machine called backend, do an update, install Node.js, do git clone, install libraries.
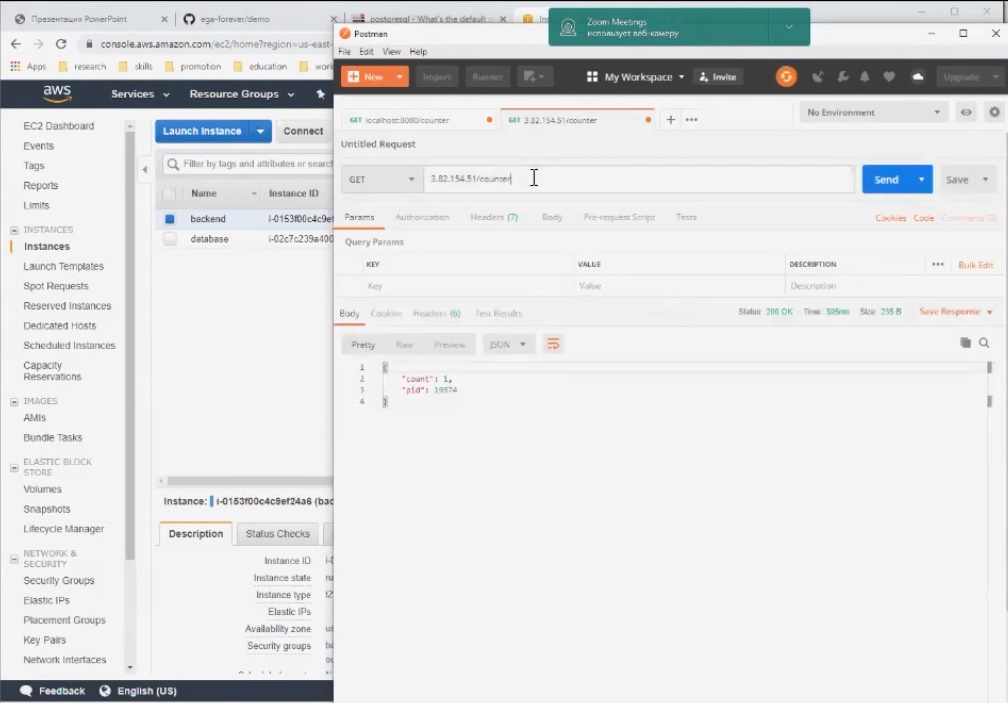
Next, we raise the base. Please note that Node and Postgres work on different machines. The moment of glory- connection to the application through a public address. Hooray, everything works!
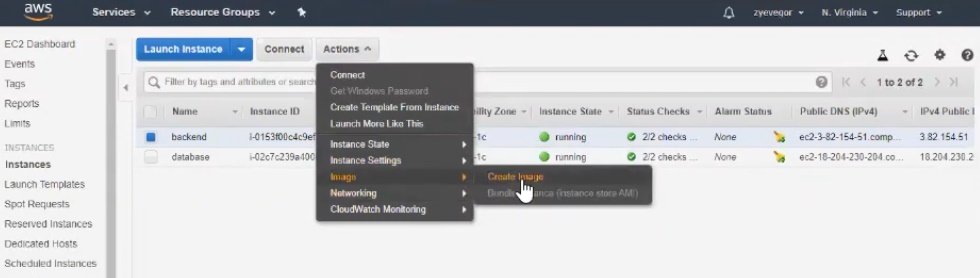
The next stage is the creation of our own AMI image, which will be available to us. Based on this AMI image, we can make a copy of our backend and deploy it in two clicks. To do this, go to “Image” – “Create Image”.
After creating the image, we make the necessary settings. There are very few options: for example, you need to specify the minimum size of the hard disk. We are talking about the size of the snapshot, it means, in fact, the snapshot will be removed from the hard drive on which we have everything installed. We can say that AMI is a virtual entity consisting of image and snapshot settings with the installed OS (in our case, the OS with Node.js and our application).
An important point: it will take about five minutes to create a snapshot, during which the machine will be in hold status (the “fatter” your image is, the more time it will hold).
Let’s name the image, for example, backend-ami. The name is presented here:
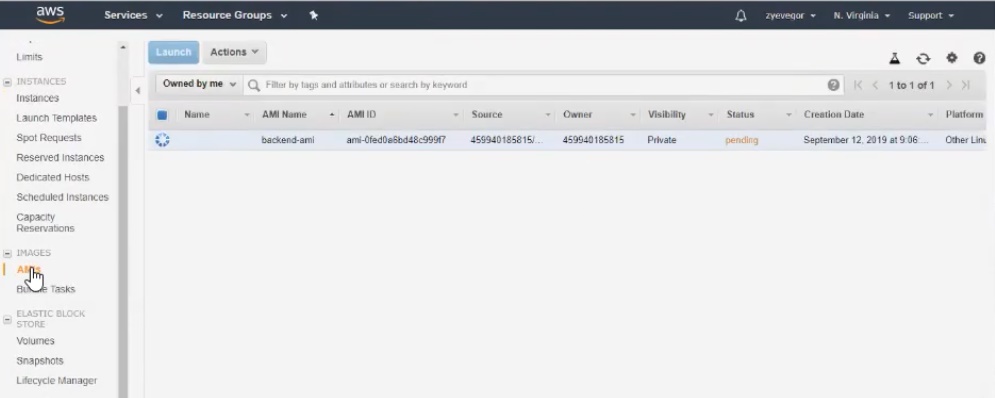
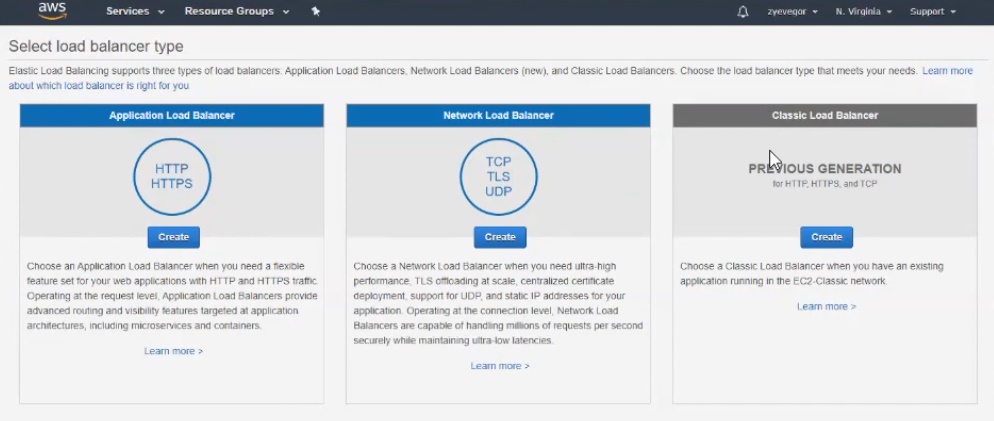
After creating the image, we can replicate it and get the same copy of the machine in just a few clicks. And to connect to the machines not separately, but through load balancers. There are several balancers to choose from, which differ in balancing algorithms. Setting up the selected balancer will not cause difficulties, although there are nuances that are important to remember.
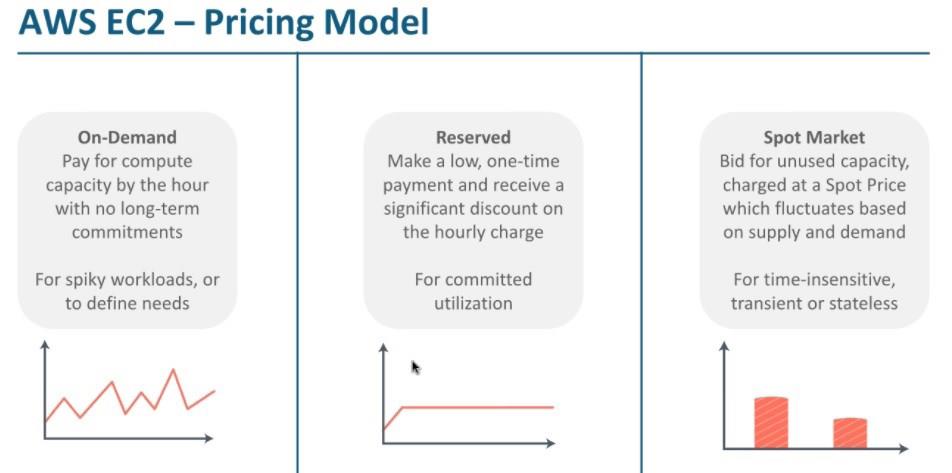
Pricing models
AWS EC2 offers 4 pricing models. The screenshot below contains descriptions of three of them: Reserved, Spot Market, and On-Demand.
In addition to the choice of models, AWS EC2 service is also good because it is integrated (like many other AWS products) with AWS monitoring system – Cloudwatch. This monitoring system is flexibly configured and allows you to monitor both the consumption of resources and the budget. In just a few clicks, you can set a limit on the use of EC2 resources, after which you will receive a notification, for example, by email.
AWS implementation for your business is more that easy with System Admins PRO. Contact us right now!